Unit 2.2 Data Compression, Images HACKS
Demonstrate a usage of numpy and PIL with dynamic user input to generate blue scaled images and brightened images


The Breakdown
This program expands on the current model that we went over in class. I've retained a similar class structures, with minor edits to one method for blue scaling and added a new method to handle brightening the images.
Bluescaling
This methods expands on the original greyscaling (black and white) method. However, instead of calculating an average, I just set all other color channels to a value of 0, and maintain the original coloration of the blue channel.
Original:
average = (pixel[0] + pixel[1] + pixel[2]) // 3
...
image['gray_data'].append((average, average, average, pixel[3]))
Modified:
blue_data.append((0, 0, pixel[2], pixel[3]))
Brightness
This method was also simple to create as we've already established a baseline for converting an image into an np array of pixel rgb values. All I needed to do to increase the brightness was to take in a percentage from a user, and multiply each pixel value by said ratio to increase the overall brightness by the user specified values.
One thing that we did need to be careful of, was to take into account that the multipled value may be greater than 255, which is the maximum accepeted value for any RGB value. To do this, we would use the min() method to perform selection
# Create Brightened Base64 representation of Image
    def image_to_html_brightened(self):
        img_brightened = self._img
        numpy = np.array(self._img.getdata()) # PIL image to numpy array
        ratio = 1+int(input("How much do you want to scale the brightness by? (0-50%)"))/100 # Convert user inputted number into a percentage, then add that onto 1 to get our multiplier
        assert ratio < 1.5
        brightened_data = []
        for pixel in numpy:
            # Now we try to apply the multiplier to each color channel, we use the min() method here to avoid values greater than 255, the upper limit
            try:
                brightened_data.append((min(int(round(pixel[0]*ratio)), 255), min(int(round(pixel[1]*ratio)), 255), min(int(round(pixel[2]*ratio)), 255), pixel[3])) # PNG format
            except:
                brightened_data.append((min(int(round(pixel[0]*ratio)), 255), min(int(round(pixel[1]*ratio)), 255), min(int(round(pixel[2]*ratio)), 255)))
            # end for loop for pixels

        print("Image scaled by {0}%".format((ratio-1)*100))
        img_brightened.putdata(brightened_data)
        return self.image_to_html(img_brightened)
from IPython.display import HTML, display
from pathlib import Path  # https://medium.com/@ageitgey/python-3-quick-tip-the-easy-way-to-deal-with-file-paths-on-windows-mac-and-linux-11a072b58d5f
from PIL import Image as pilImage # as pilImage is used to avoid conflicts
from PIL import ImageOps
from io import BytesIO
import base64
import numpy as np


class Image_Data:

    def __init__(self, source, label, file, path, baseWidth=320):
        self._source = source    # variables with self prefix become part of the object,
        self._label = label
        self._file = file
        self._filename = path / file  # file with path
        self._baseWidth = baseWidth

        # Open image and scale to needs
        self._img = pilImage.open(self._filename)
        self._format = self._img.format
        self._mode = self._img.mode
        self._originalSize = self.img.size
        self.scale_image()
        self._html = self.image_to_html(self._img)
        self._html_brightened = self.image_to_html_brightened()
        self._html_blue = self.image_to_html_blue()


    @property
    def source(self):
        return self._source

    @property
    def label(self):
        return self._label

    @property
    def file(self):
        return self._file

    @property
    def filename(self):
        return self._filename

    @property
    def img(self):
        return self._img

    @property
    def format(self):
        return self._format

    @property
    def mode(self):
        return self._mode

    @property
    def originalSize(self):
        return self._originalSize

    @property
    def size(self):
        return self._img.size

    @property
    def html(self):
        return self._html

    @property
    def html_blue(self):
        return self._html_blue

    @property
    def html_red(self):
        return self._html_red

    @property
    def html_green(self):
        return self._html_green

    @property
    def html_brightened(self):
        return self._html_brightened

    # Large image scaled to baseWidth of 320
    def scale_image(self):
        scalePercent = (self._baseWidth/float(self._img.size[0]))
        scaleHeight = int((float(self._img.size[1])*float(scalePercent)))
        scale = (self._baseWidth, scaleHeight)
        self._img = self._img.resize(scale)

    # PIL image converted to base64
    def image_to_html(self, img):
        with BytesIO() as buffer:
            img.save(buffer, self._format)
            return '<img src="data:image/png;base64,%s">' % base64.b64encode(buffer.getvalue()).decode()

    # Create Brightened Base64 representation of Image
    def image_to_html_brightened(self):
        img_brightened = self._img
        numpy = np.array(self._img.getdata()) # PIL image to numpy array
        ratio = 1+int(input("How much do you want to scale the brightness by? (0-50%)"))/100 # Convert user inputted number into a percentage, then add that onto 1 to get our multiplier
        assert ratio < 1.5
        brightened_data = []
        for pixel in numpy:
            # Now we try to apply the multiplier to each color channel, we use the min() method here to avoid values greater than 255, the upper limit
            try:
                brightened_data.append((min(int(round(pixel[0]*ratio)), 255), min(int(round(pixel[1]*ratio)), 255), min(int(round(pixel[2]*ratio)), 255), pixel[3])) # PNG format
            except:
                brightened_data.append((min(int(round(pixel[0]*ratio)), 255), min(int(round(pixel[1]*ratio)), 255), min(int(round(pixel[2]*ratio)), 255)))
            # end for loop for pixels

        print("Image scaled by {0}%".format((ratio-1)*100))
        img_brightened.putdata(brightened_data)
        return self.image_to_html(img_brightened)

    # Create Grey Scale Base64 representation of Image
    def image_to_html_blue(self):
        img_blue = self._img
        numpy = np.array(self._img.getdata()) # PIL image to numpy array
        blue_data = []
        for pixel in numpy:
            # Same syntax as before, but we set all color channels to 0
            try:
                blue_data.append((0, 0, pixel[2], pixel[3])) # PNG format
            except:
                blue_data.append((0, 0, pixel[2]))
            # end for loop for pixels

        img_blue.putdata(blue_data)
        return self.image_to_html(img_blue)

    def mirror(self):
        img = np.fliplr(np.array(self._img)) # PIL image to numpy array
        print(img)
        img_mirror = pilImage.fromarray(img)
        return self.image_to_html(img_mirror)


# prepares a series of images, provides expectation for required contents
def image_data(path=Path("images/"), images=None):  # path of static images is defaulted
    if images is None:  # default image
        images = [
            {'source': "Internet", 'label': "Green Square", 'file': "green-square-16.png"},
            {'source': "Peter Carolin", 'label': "Clouds Impression", 'file': "clouds-impression.png"},
            {'source': "Peter Carolin", 'label': "Lassen Volcano", 'file': "lassen-volcano.jpg"}
        ]
    return path, images

# turns data into objects
def image_objects():
    id_Objects = []
    path, images = image_data()
    for image in images:
        id_Objects.append(Image_Data(source=image['source'],
                                  label=image['label'],
                                  file=image['file'],
                                  path=path,
                                  ))
    return id_Objects

# Jupyter Notebook Visualization of Images
if __name__ == "__main__":
    for ido in image_objects(): # ido is an Imaged Data Object

        print("---- meta data -----")
        print(ido.label)
        print(ido.source)
        print(ido.file)
        print(ido.format)
        print(ido.mode)
        print("Original size: ", ido.originalSize)
        print("Scaled size: ", ido.size)

        print("-- scaled image --")
        display(HTML(ido.html))

        # print("--- red image ---")
        # display(HTML(ido.html_red))

        print("--- blue image ---")
        display(HTML(ido.html_blue))

        print("--- brightened image ---")
        display(HTML(ido.html_brightened))

        # print("--- green image ---")
        # display(HTML(ido.html_green))


    print()


Lossy vs Lossless
Lossy Compression: A form of compression where data is usually lost or combined with other repeatitive patterns, resulting in an endproduct that is irreversible to produce the original item.
Lossless Compression: Opposite of Lossy compression. This form for compression could compress data with greater carefullness and present a end-product that could be scaled back up to the original item. However, this typically sees performance issues as efficiency is reduced compared to lossy compression
Example

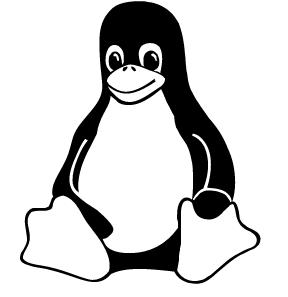
In the examples above, although the two images may look the same, the first image is lossless because of how it utilizes the SVG (Scalable Vector Graphics) format, where the image is generated by vector graphics (representation of an image through lines, curves an dots). As such, we can scale this image however we want, and our computer or browser will always render it without any loss of data, as the mathematical operations used to render the image remains the same
However, things change for the second image. The second image is a png file of a screenshot of the first image that I took in my browser. Because this image is stored in PNG (Portable Network Graphics) format, whenever we scale this image, we are bound to lose data as some pixels will merge in one way or another with others, resulting in lower graphics if we apply size compression on this image.